How to Create Website Mockups People Actually Love
Learn how to create website mockups that bridge the gap between idea and reality. Our guide covers tools, principles, and developer handoff.

Build beautiful websites like these in minutes
Use Alpha to create, publish, and manage a fully functional website with ease.


You’ve done the hard work. The design is locked in, the content is polished, and every last pixel is in its place. Your website is ready... but it’s still just sitting on your computer. So, what’s the next step to get it out into the world?
Making that leap from a local project to a live, public website can feel like a huge technical hurdle, but it really just boils down to a few logical steps. Think of it as moving into a new home. You have all your furniture and belongings (your website files), but you still need an address and the physical space to put everything.
This infographic lays out the four essential pillars of that process.
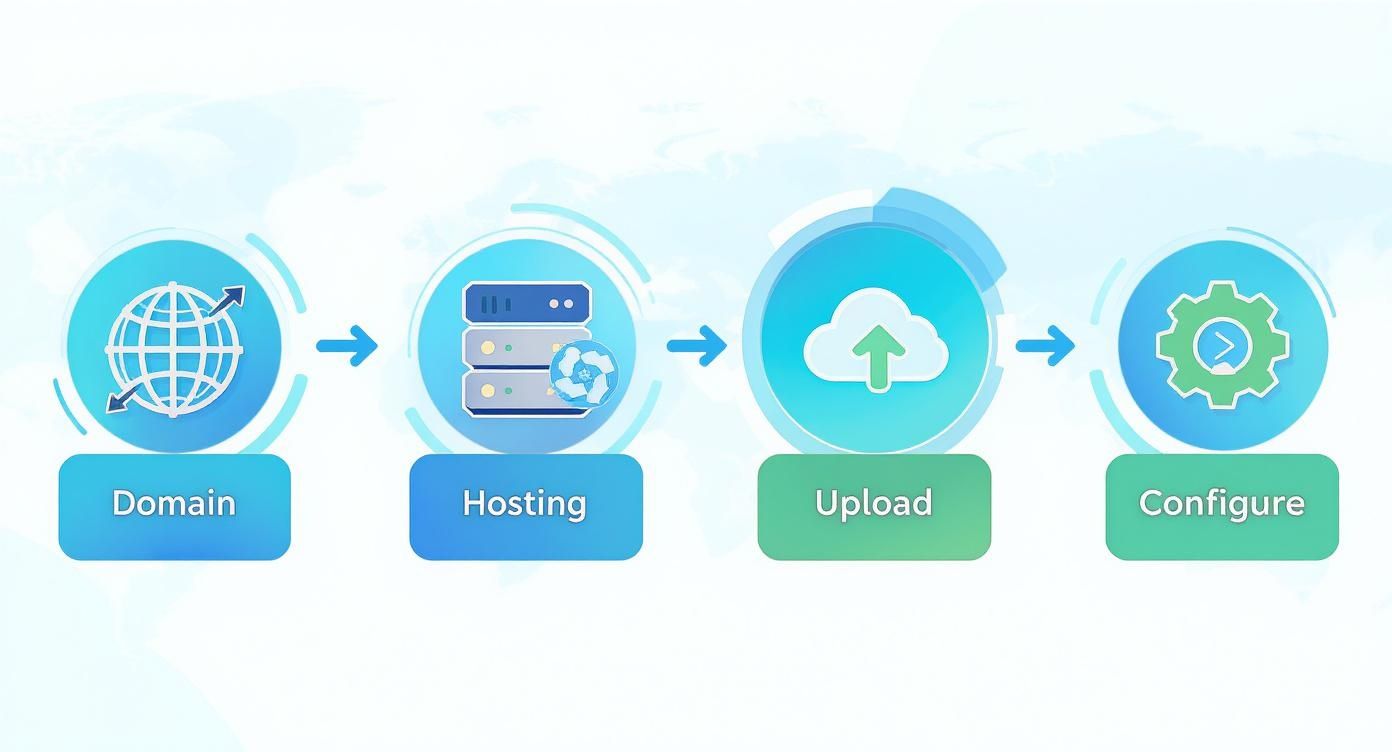
As you can see, launching your site is a sequence. Each step builds on the one before it, starting with securing your digital address and ending with the final technical setup that brings it all online.
The Modern Publishing Workflow
Publishing a website used to be a very different beast. In the early days of the web, it required serious technical chops and access to pricey servers. Thankfully, things started to change around 1995 when commercial hosting became widely available. Now, what once took weeks of work can be done in minutes, even if you’ve never written a line of code.
Let's stick with the house analogy. Your website files are the finished building, but you still need to:
Get a street address (this is your domain name).
Secure a plot of land (this is your web hosting).
Connect the utilities (this means configuring your DNS and SSL).
Getting your website live is no longer a purely technical task. Modern tools have made it an accessible, strategic step for any business owner or creator ready to establish their online presence.
Each of these components is non-negotiable. Without a domain, no one can find you. Without hosting, your site has nowhere to live. And without the right configuration, the domain won't know how to point visitors to your hosting space.
Before you jump in, having a solid plan is key. If you haven't already mapped out your site's layout, it's worth checking out our guide on how to plan website structure.
To quickly summarize these core concepts, here’s a simple breakdown of what you'll be working with.
Website Publishing Core Components at a Glance
Component | Purpose | Key Action |
|---|---|---|
Domain Name | Your website's unique, memorable address (e.g., | Purchase and register a domain from a registrar like Namecheap or GoDaddy. |
Web Hosting | The server space where your website's files are stored and served to visitors. | Choose a hosting plan (shared, VPS, etc.) that fits your site's needs. |
Website Files | The HTML, CSS, JavaScript, and images that make up your site. | Upload these files from your computer to your hosting server. |
DNS/SSL | The systems that connect your domain to your host and secure the connection. | Point your domain's nameservers to your host and activate an SSL certificate. |
Getting these four pieces in place is the foundation of a successful launch. With a clear understanding of each part, you'll be ready to tackle the process with confidence.
Choosing Your Domain Name and Web Hosting
Before your website can go live, it needs two things: an address (domain name) and a place to live (web hosting). It's a lot like real estate. Think of the domain as your unique street address and the hosting as the plot of land where you'll build. Nailing these two from the get-go is the first real step to getting your site out there for the world to see.
Your domain name is your brand's digital handshake. It needs to be memorable, easy to spell, and ideally, a clear reflection of who you are. A confusing name can turn potential visitors away, while a strong one builds instant recognition. For example, a bakery called "The Daily Rise" would want thedailyrise.com, not something clunky like daily-rise-bakery-online.net.

Finding the Perfect Domain Name
When you're brainstorming ideas, aim for clarity and simplicity above all else. Try to steer clear of hyphens and numbers—they're a pain to say out loud and easy for people to forget. While .com is still the gold standard, other extensions like .io for a tech startup or .org for a non-profit can work perfectly if they fit your niche.
A few quick tips from the trenches:
Keep it short. The fewer characters, the better. It's just easier to type and remember.
Make it brandable. You want something unique that sticks, not a generic phrase stuffed with keywords.
Check availability. Head to a domain registrar and see if your top choice is available. If it’s taken, don't get discouraged. Try a small variation or see if a different extension feels right.
For a much deeper look into picking the right name, check out our full guide on choosing a domain name.
Understanding Web Hosting Options
Okay, you’ve got your address. Now you need the land. Web hosting is simply the service that stores all your website's files on a server, making them accessible to anyone on the internet. The right hosting plan really depends on your site's needs—how big it is, how much traffic you expect, and of course, your budget.
Here's a quick rundown of the usual suspects:
Hosting Type | Best For | Analogy |
|---|---|---|
Shared Hosting | New websites, personal blogs, small businesses with low traffic. | Renting an apartment in a large building with shared utilities. |
VPS Hosting | Growing businesses that need more resources and control. | Owning a townhouse; you have your own space but share the property. |
Dedicated Hosting | High-traffic websites, large e-commerce stores, and applications. | Owning a standalone house with your own land and full control. |
For most people just starting out, shared hosting is the way to go. It's cost-effective, user-friendly, and has more than enough power to get a new site off the ground. You can always upgrade later as your traffic grows.
Think of your hosting provider as a business partner. Don't just shop on price. Look for an uptime guarantee of 99.9% (that's the industry standard), responsive customer support, and the ability to scale up when you're ready.
Sifting through all the hosting companies can be a headache, with each one promising the moon. To cut through the noise, this guide on how to choose web hosting is a fantastic resource. It gives you a practical framework for comparing your options and helps you avoid overpaying for features you'll never use.
Getting Your Website Files Online
You've got your domain name and a hosting plan—think of it as having a street address and an empty plot of land. Now, it's time to build the house. In web terms, this means moving all the files that make up your website from your computer to your web host's server. This whole process is called "deployment," and it's the final step before your site is officially live.
How you get your files online really depends on your tools and how comfortable you are with the technical side of things. Let's walk through the most common ways to do it, from the old-school methods to the slick, modern solutions.
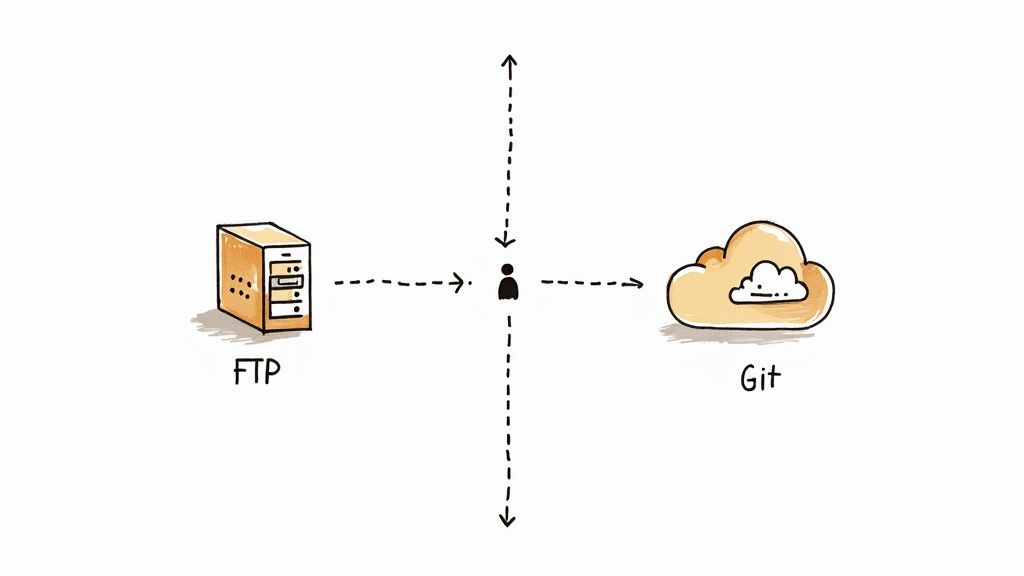
The Classic Approach: Using an FTP Client
For a long, long time, the standard way to upload a website was with FTP (File Transfer Protocol) or its more secure cousin, SFTP. The easiest way to think about an FTP client is as a bridge between your computer's folders and your web server's folders.
To do this, you'll need a couple of things:
An FTP Program: There are plenty of great, free options out there. FileZilla, Cyberduck, and WinSCP are all solid choices.
Your FTP Login Details: Your hosting provider gives you these. Dig around in your hosting control panel (like cPanel) for the server address (host), username, password, and port number—it's usually port 21 for FTP and 22 for SFTP.
Once you log in, the program will show you a split screen. On one side, you'll see your computer's files. On the other, the empty folders on your server. Your mission is simple: drag your website files from your side over to the server's main public folder. This folder is almost always called public_html or www.
A word of caution: Make sure you're dropping your files directly into that
public_htmlfolder. It's a super common mistake to put them somewhere else, which usually results in a blank page or an error when you visit your domain.
The Simple Way: Using a Website Builder Like Alpha
If you used a website builder to create your site, you get to skip all that technical stuff. This is where platforms like Alpha really shine—they bake the deployment right into the platform, turning a potentially confusing process into a one-click affair.
For instance, with Alpha, you do all your design and content work in their visual editor. When you're happy with how everything looks and feels, you just connect your domain and click "Publish." That's it.
Here’s a peek at the kind of clean dashboard you’d see right before hitting the publish button.
Behind the scenes, the platform is taking care of all the heavy lifting—organizing your files, configuring the server, and pushing everything live. If you'd rather spend your time on your business instead of server logistics, this is the way to go.
The Developer's Choice: Modern Deployment with Git
For those who are more technical or working on a team, using Git is a far more robust and efficient way to deploy a website. Instead of manually moving files around, you "push" your code changes from your computer directly to the server. It’s a game-changer for collaboration and makes it incredibly easy to undo a change if something goes wrong.
Many modern hosting companies now integrate directly with Git platforms like GitHub, GitLab, or Bitbucket. You link your hosting account to your project's repository, and from then on, every time you update your code, the changes automatically go live. This workflow is known as continuous deployment, and it's how professional development teams operate.
This method pretty much eliminates the "oops, I forgot to upload that one file" problem and gives you a complete history of every change ever made. It definitely has a steeper learning curve than FTP, but for any serious or long-term project, the gains in speed and reliability are massive.
Finalizing Your Setup with DNS and SSL
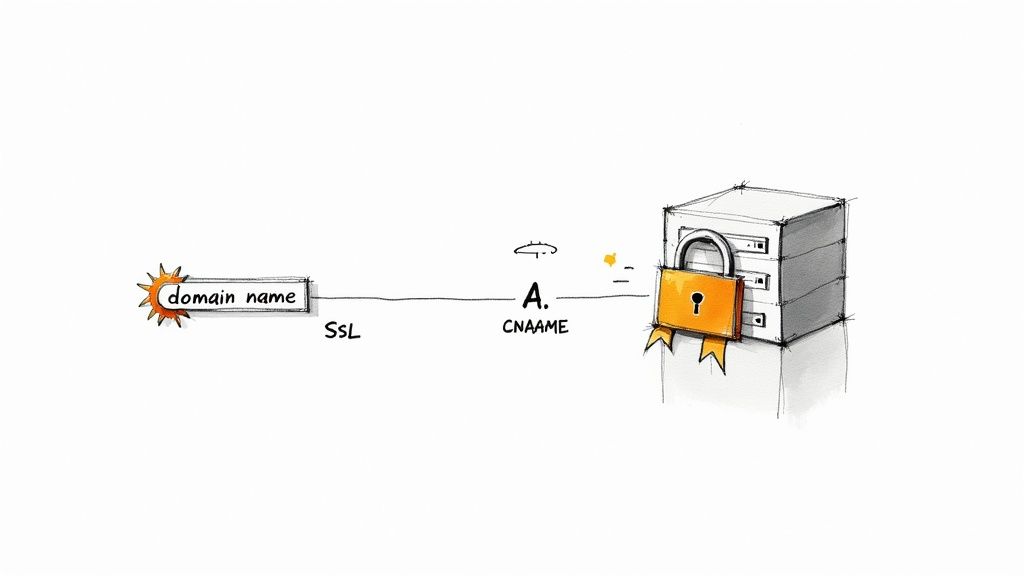
You've successfully uploaded your website's files to a server—that's a huge milestone. But right now, if someone types your domain name into their browser, they'll hit a dead end. Your domain simply doesn't know where to find your site yet. Let's fix that by connecting the dots with DNS and adding a layer of security with SSL.
Think of the Domain Name System (DNS) as the internet's master contact list. It’s the magic that happens behind the scenes, translating a memorable domain like yourbusiness.com into the server's specific IP address that computers use to communicate.
To make this connection, you need to update your nameservers. Your hosting provider gives you these—usually two addresses that look something like ns1.hostingcompany.com and ns2.hostingcompany.com. Just log in to your account where you bought the domain (your registrar), head to the DNS settings, and swap out the existing nameservers with the new ones from your host.
DNS Propagation: A Quick Waiting Game
Once you hit save, you've started a process called DNS propagation. This is essentially a global update, where servers all across the internet begin to learn about your domain's new home. It isn't instantaneous; this can take anywhere from a few minutes up to 48 hours, though in my experience, it's usually on the faster side.
The best thing you can do now is sit tight. During propagation, your site might be visible to you but not your neighbor, or vice versa. It’s best to wait until things have settled before you start sharing the link.
Securing Your Site with an SSL Certificate
With your domain now pointing to the right server, there's one last essential step: security. An SSL (Secure Sockets Layer) certificate is what adds the "s" to https and gives visitors that reassuring padlock icon in their browser. It encrypts the connection between your site and its users, protecting everything from login details to payment information.
In today's web, SSL is non-negotiable. Google gives a slight ranking boost to secure sites and, more importantly, browsers like Chrome will flag any site without HTTPS as "Not Secure." That's a huge red flag for visitors and an easy way to lose their trust.
Thankfully, getting an SSL certificate is easier than ever. Most hosting companies now offer free certificates through services like Let's Encrypt, and you can often activate one with a single click from your hosting dashboard. For the vast majority of websites, a free SSL provides all the security you need.
It's really worth understanding the necessity of an SSL certificate for both user trust and your search engine visibility.
Once your SSL is active and the DNS has fully propagated, that's it! Your website is officially live, secure, and ready for visitors. All the technical pieces have finally clicked into place.
Your Essential Post-Launch Checklist
That feeling of hitting the "publish" button is fantastic, but the job isn't quite over. Think of launching your website as the starting line, not the finish. Now comes the really important part: testing, monitoring, and making sure all that hard work gives your visitors a great experience. A few quick checks right now can save you from some major headaches later on.
Before you share your new site with the world, it's a good idea to step back and browse through it like a first-time visitor. This initial quality check is your best defense against those small, easy-to-miss problems that can really ruin a user's first impression.
Run a Full Functionality Audit
First up, you need to be certain everything actually works. We're not talking about design tweaks here—this is all about pure function. A single broken link or a contact form that goes nowhere can mean a lost sale or a frustrated reader clicking away.
Here’s what your initial audit should focus on:
Click Every Single Link: Go through your site with a fine-toothed comb. Check every link in your navigation menu, every button, all the links in your footer, and any within your page content. A 404 "Not Found" error is a dead end you don't want your visitors to hit.
Test All Your Forms: Fill out and submit every form on your site, whether it's for contact, a newsletter signup, or a quote request. You need to confirm two things: that you actually receive the submission, and that the user sees a clear "thank you" message so they know it worked.
Verify Mobile Responsiveness: Don't just trust your site builder's preview. Pull out your own smartphone and tablet and actually navigate your site. Is the text easy to read without pinching and zooming? Are the buttons big enough for a thumb to tap easily? With around 60% of all website traffic coming from mobile, this is non-negotiable.
Analyze Your Website Performance and Speed
Once you know everything works, it's time to see how fast it works. A slow-loading website is one of the quickest ways to lose a visitor.
You can use a free tool like PageSpeed Insights from Google to get a detailed breakdown of your site's load time. It will give you a performance score and, more importantly, actionable tips on how to speed things up.
As a rule of thumb, aim for your key pages to load in under 3 seconds. I've seen firsthand how even a one-second delay can cause a significant drop in conversions. Taking the time to optimize your images and code really does pay off.
This process of checking and refining is just one piece of keeping your site in top shape. For a more detailed guide on ongoing care, our website maintenance checklist is a great resource for building long-term habits.
Get Your Monitoring Tools in Place
After you've confirmed your site is technically solid, the final step is to set up the tools that will give you crucial insights into your audience and search performance. Without data, you're just guessing.
There are two platforms you absolutely need to set up right away:
Google Analytics: This is the industry standard for understanding your website traffic. It shows you how many people visit your site, where they come from (e.g., Google, social media), which pages they spend the most time on, and much more. It's the key to understanding visitor behavior.
Google Search Console: This tool is your direct line to Google itself. It helps you see your site through the eyes of a search engine, showing you which keywords are driving traffic, alerting you to technical SEO problems, and letting you submit your sitemap to get your pages indexed faster.
Setting up these tools is the final, crucial piece of the launch puzzle. They provide the data you need to make smart decisions, grow your audience, and ensure your new website doesn't just launch, but truly thrives.
To help you stay organized, here’s a quick checklist you can run through right after your site goes live.
Post-Launch Website Testing Checklist
Test Area | What to Check | Common Tools |
|---|---|---|
Functionality | All internal and external links work; forms submit correctly; interactive elements (sliders, accordions) function as expected. | Manual Clicking, Screaming Frog SEO Spider (for broken links) |
Cross-Browser | Site displays correctly on Chrome, Firefox, Safari, and Edge. | BrowserStack, Manual checks on different browsers |
Responsiveness | Layout adapts properly to mobile, tablet, and desktop screen sizes; text is readable and buttons are tappable on all devices. | Your own devices, Chrome DevTools (Device Mode) |
Performance | Page load speed is under 3 seconds; images are optimized. | |
SEO Basics | Title tags and meta descriptions are present; | Google Search Console, Manual source code review |
Analytics | Tracking codes (e.g., Google Analytics) are installed and firing correctly on all pages. | Google Tag Assistant, Real-time reports in Analytics |
Running through these checks will give you peace of mind, knowing your new website is not only live but also ready to make a great impression on every visitor.
Common Website Publishing Questions
https://www.youtube.com/embed/2zGvUlE8X5w
It’s completely normal to have a few nagging questions as you get ready to push your website live. Clearing these up beforehand can save you a ton of stress. Let's walk through some of the things that people trip up on most often right before launch.
So, how long does it actually take for a site to show up for everyone? Once you’ve pointed your domain to your new host, a process called propagation kicks off. This can technically take anywhere from 30 minutes to 48 hours, but in my experience, you’ll usually see it pop up within a few hours.
Another thing that often trips people up is the difference between a domain registrar and a web host. It's simple when you think about it like this: your registrar (like Namecheap or GoDaddy) is where you buy your website’s address. Your web host (like Bluehost or SiteGround) is the plot of land online where your website actually lives. They can be the same company, but they don't have to be.
Key Publishing Concerns Addressed
I get this one a lot: "Can I publish my website for free?" The short answer is yes, but with a catch. You can use a free subdomain on platforms like WordPress.com or GitHub Pages, but for a truly professional look, you'll want a custom domain and proper hosting. Think of it as a small but necessary investment in your brand's credibility.
What if visitors see that dreaded "Not Secure" warning in their browser? That's a clear sign your SSL certificate isn't working correctly. Don't panic! Most modern hosts give you a free SSL and let you activate it with just a click. This is a non-negotiable fix for building trust and helps your SEO.
A common fear is messing something up and taking the whole site down. The good news is that most publishing mistakes are easily undone. If you upload files to the wrong spot or typo a DNS record, you can almost always backtrack and fix it.
Once your site is officially live, what's next on the to-do list?
Submit Your Sitemap: Head straight to Google Search Console and submit your XML sitemap. This gives Google the map to your new content so it can get indexed.
Run a Speed Test: Pop your URL into a tool like Google PageSpeed Insights. It’ll give you a performance score and a list of easy wins to make your site faster.
Announce Your Launch: Don't be shy! Share the link on your social channels and send an email to your list to get those first crucial visitors.
Ready to skip the technical hurdles and get your site live in minutes? With Alpha, you can publish a professional, AI-designed website with just one click. Drop in a URL for inspiration, describe your edits, and launch with confidence. Create your website with Alpha today.
Build beautiful websites like these in minutes
Use Alpha to create, publish, and manage a fully functional website with ease.