


How to Create Website Mockups People Actually Love
Learn how to create website mockups that bridge the gap between idea and reality. Our guide covers tools, principles, and developer handoff.
Build beautiful websites like these in minutes
Use Alpha to create, publish, and manage a fully functional website with ease.
If you're a photographer, your website isn't just another item on a to-do list—it's the single most important tool for your business. In a world of fleeting social media posts, your website is your permanent, professional home base online.
Your Website Is Your Most Valuable Business Tool
Let's be real: Instagram is great for discovery, but it's a terrible place to do business. The algorithm is fickle, and you're competing with a million distractions. A dedicated website, on the other hand, puts you in the driver's seat. It's where you have complete control over your brand, your message, and how potential clients actually experience your photography.
Think of it as your digital studio, open 24/7. This is where clients can explore your best work without getting sidetracked by a cat video. It’s where they learn about your style, your process, and why you're the right person for the job—a level of depth a social media bio just can't offer.
Own Your Audience, Own Your Brand
The biggest perk of having your own site? Ownership. The followers you gain on social media are essentially rented. The platform can change the rules, tank your reach, or disappear tomorrow. Your website and the audience you build through it are assets you own, period.
This is a game-changer for your business:
Direct Client Communication: You can gather emails for a newsletter, giving you a direct line to people who genuinely want to hear from you—no algorithm involved.
Tell the Whole Story: Your site is the perfect place for deeper storytelling. Share the stories behind your favorite shoots, explain your creative process, and build a real connection that goes beyond a simple "like."
Total Brand Control: From the fonts and colors to the exact flow of your galleries, you control every single detail. This ensures your brand looks professional and consistent every time.
A Powerful Engine for Growth
A great website is more than just a pretty portfolio; it's a hard-working sales and marketing machine. It's out there finding you work even while you're sleeping. With the right features, your site can handle inquiries, book sessions for you, and even sell prints or digital downloads automatically.
A professional website immediately signals to high-value clients that you're a serious business owner, not just a hobbyist. It builds instant credibility and justifies your pricing in a way a social media profile never could.
Ultimately, putting in the effort to build a proper website is one of the smartest investments you can make in your business's future. It’s what separates photographers who just post pictures online from those who run a successful, thriving brand.
Laying the Groundwork for a Client-Focused Website
Before you even think about design templates or color palettes, the most important work needs to happen. Building a photography website that actually books clients isn't about just throwing your favorite images online. It’s about building a strategic tool designed to attract a very specific kind of person. This foundational stage is what makes sure every single decision—from layout to language—has a clear and profitable purpose.
The very first thing you need to do is get laser-focused on your niche. It’s the difference between being a fine-art wedding photographer for luxury clients and a photographer capturing gritty, authentic moments for commercial lifestyle brands. Knowing that distinction is everything. A website that tries to appeal to everyone will, I promise you, appeal to no one.
Define Your Ideal Client Persona
I want you to think beyond broad categories like "couples" or "families." Get specific. Give your ideal client a name, a job, even a personality. What keeps them up at night? What kind of experience are they secretly hoping for? A high-end bride values a seamless, premium experience and wants to feel taken care of, while a startup founder needs commercial shots that scream energy and innovation—and they need them yesterday.
Your website's entire vibe—from the copy you write to the fonts you choose—should speak directly to this one person. This is how you create a site that doesn't just display pretty pictures but connects with the right audience on an emotional level, making them feel like you just get them. To really make an impact, your goal is to create Ten Tips For A Standout Online Presence.
Curate a Killer Portfolio
Your portfolio is not an image dump. Let me say that again: it is not an image dump. It's a highly curated gallery with one job: to convince your ideal client that you are the only photographer for them.
Resist the powerful urge to show every decent photo you've ever taken. Instead, be ruthless. Select 20-30 of your absolute best images that align perfectly with the work you want to be hired for.
A powerful portfolio tells a cohesive story. Each image should reinforce your unique style and show off the exact kind of work you want more of. If you want to shoot adventurous elopements in the mountains, don't fill your portfolio with traditional studio portraits.
If you shoot in a couple of different specialties, structure your portfolio into logical galleries, like 'Weddings' and 'Engagements.' This makes navigating your site a breeze and helps visitors find what they’re looking for without getting overwhelmed and clicking away.
As you can see, a strong gallery is the front door. It’s what directly influences a visitor's decision to stick around and, ultimately, book you.
Gather Your Essential Brand Assets
Okay, with your target client and portfolio dialed in, it’s time to get your assets in a row. Having these pieces ready before you start building will make the whole process so much smoother. With the photography services market forecasted to hit USD 47.46 billion by 2030, having a polished online presence is no longer optional—it's essential for standing out.
Here’s a quick pre-build checklist of what you'll need:
Professional Bio: Write a short, engaging bio that lets your personality shine through. Don't just list credentials; explain why you do what you do. For some great pointers, check out this guide on https://www.alpha.page/blog/how-to-write-website-copy that connects.
Polished Logo: This is your visual signature. Make sure you have high-resolution versions on hand for your website's header, footer, and even the tiny favicon in the browser tab.
Client Testimonials: Social proof is incredibly powerful. Go find 3-5 of your best client quotes. You want the ones that don't just say "the photos were great," but that highlight the experience of working with you.
Service Packages & Pricing: Get your offerings clearly outlined. Even if you primarily offer custom quotes, having well-defined starting points helps manage client expectations from the get-go.
Designing Your Visually Stunning Online Studio
Now for the fun part. You’ve done the strategic groundwork, and it’s time to bring your vision to life by designing a beautiful, functional online studio. This is where you translate your brand's soul into a digital experience that doesn't just display your work—it pulls people in and makes them feel something.
Not too long ago, this meant sinking endless hours into clunky design tools, pushing pixels around, and fighting with code. Thankfully, those days are over. Modern AI-powered builders have flattened the learning curve, letting you achieve that high-end, agency-quality look in a tiny fraction of the time.
Using AI for a Major Design Head Start
Forget staring at a blank screen. What if you could generate a professional layout in minutes, just by showing an example of a site you love? This isn't science fiction anymore; it’s a seriously practical tool that can kickstart your whole design process.
Let's say you're a wedding photographer and you’ve always admired the clean, elegant portfolio of a top competitor. With an AI website builder, you can often just plug in that website's URL. The AI scans its structure, layout, colors, and fonts, then generates a completely unique, ready-to-customize template inspired by it. This website format copying feature is an absolute game-changer, potentially saving you days of manual work. You can see how this works on Alpha's platform.
This gives you an incredible starting point. You get a professionally designed foundation that you can immediately make your own by adding your logo, brand colors, and of course, your own incredible images.
Choosing and Customizing Your Template
If you prefer a more traditional route, starting with a pre-designed template is a great option. The trick is to pick one that acts as a frame for your photography, not one that competes with it.
Your template is the gallery wall for your art. A minimalist design with plenty of white space is perfect for a fine-art photographer. A dark, moody theme might be a better fit for a dramatic portrait artist or commercial photographer.
Once you have your base, customization is where your brand's personality really shines through. This goes way beyond just sticking your logo at the top.
Colors: Weave in your primary and secondary brand colors. Use your main color strategically for important things like call-to-action buttons and links to naturally guide the visitor's eye.
Typography: Stick to two or three complementary fonts—one for headings, one for body text, and maybe an accent font for special touches. Readability is everything, so make sure your main paragraph font is clean and easy on the eyes.
Visual Hierarchy: This is about intentionally arranging elements to pull attention to what matters most: your best photos and your "Contact Me" button. We have a great guide to help you master visual hierarchy in web design if you want to dive deeper.
Crafting Immersive Galleries and Nailing the Mobile Experience
Your galleries are the heart and soul of your website. This is where your images need to do the talking, so the design should be immersive and completely free of distractions. Think full-screen slideshows, elegant grids, or masonry-style layouts that let your photos take center stage.
How you present your work can tell a story. A wedding photographer, for instance, could use a long-scrolling gallery to walk a visitor through the narrative of a wedding day. A commercial photographer might go for a bold, one-image-per-scroll layout to give each shot maximum impact.
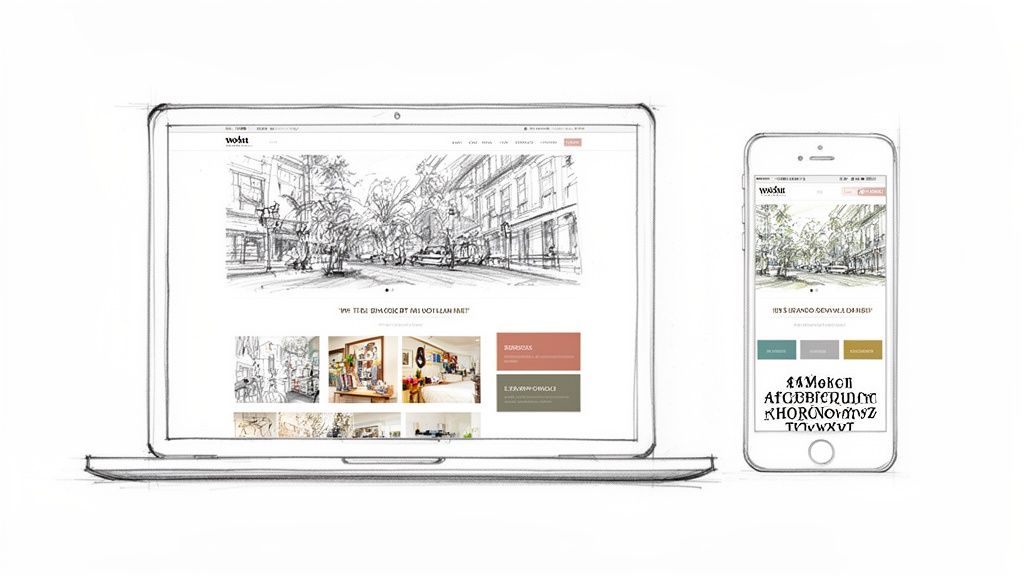
Finally, none of this matters if your site falls apart on a smartphone. A huge chunk of your traffic will come from mobile devices, so a responsive design isn’t just a nice-to-have; it's essential. Every single element, from your galleries to your contact form, has to look and work perfectly on any screen size.
The good news is that modern website builders handle this for you automatically, creating a seamless experience for every visitor. It guarantees that whether a potential client finds you on their desktop at the office or on their phone during their commute, your work always looks absolutely flawless.
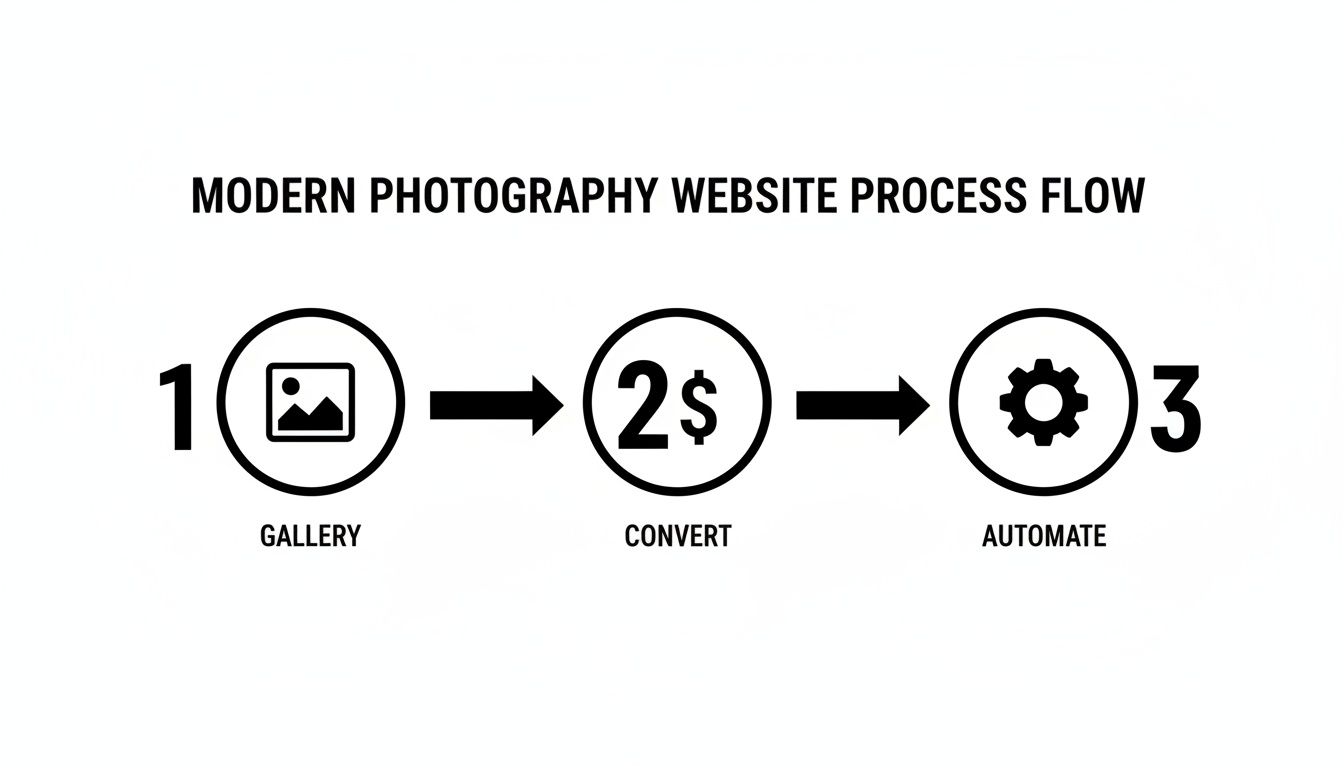
4. Get Found: Nailing SEO and Image Optimization
Let's be real: you can have the most breathtaking portfolio in the world, but if potential clients can't find you on Google, it might as well be invisible. This is where getting smart about Search Engine Optimization (SEO) comes into play. For photographers, this journey starts with your most critical asset: your images.
Before you even think about uploading a photo, you have to get it web-ready. Huge, high-resolution files straight out of your camera will absolutely kill your website's loading speed. A slow site doesn't just frustrate visitors—it gets penalized by search engines, pushing you down the rankings. The trick is to strike that perfect balance between stunning image quality and a lean file size.
Prepping Your Images for the Web
First things first: resizing. For a full-width image on most websites, a width between 2000 and 2500 pixels is plenty. Anything more is usually overkill and just adds unnecessary weight. After resizing, you need to compress the file, a process that cleverly shrinks the file size without a noticeable drop in visual quality.
A few quick rules of thumb:
File Format: Stick with JPEG for your photos. It offers the best compression for the kind of complex color information found in photographs. Use PNG only when you need transparency, like for a logo.
Compression Tools: Services like TinyPNG or a desktop app like ImageOptim work wonders. Many modern website builders also have fantastic built-in compression that handles this automatically when you upload.
Filename: This one is huge. Ditch the generic
_DSC8452.jpg. Rename your files with descriptive, keyword-rich names before you upload. Something likechicago-millennium-park-wedding-photo.jpggives Google immediate, valuable context.
Getting your image optimization right is a non-negotiable part of building a professional photography website. It ensures a zippy experience for your visitors and gives you a serious leg up in the SEO game. For a more detailed breakdown, our guide on how to optimize images for the web goes even deeper.
Mastering On-Page SEO Basics
With your images optimized, it's time to work on the on-page SEO elements—the text that tells search engines what your site is all about. This is how you start showing up when your ideal clients search for photographers.
Alt Text is Your Secret Weapon Alternative text (or alt text) is a short, written description of an image. Its main job is accessibility, allowing screen readers to describe the image to visually impaired users. But search engines read it, too, using it as a strong clue to understand what your photo depicts.
This isn't the place to just cram in keywords. Write a genuinely helpful description. Instead of "photo," describe what's happening: "bride and groom smiling during their wedding ceremony at sunset on a beach." It’s better for people and for Google.
Crafting Titles and Meta Descriptions That Get Clicks Your page title and meta description are your business card in Google's search results. They are your first, and often only, chance to convince someone to click on your link instead of a competitor's.
Page Title: Make it punchy and include your main keyword phrase. Think like a client: "Adventurous Colorado Elopement Photographer | Jane Doe Photography."
Meta Description: This is your 160-character sales pitch. It should expand on the title and include a call to action. For example: "Capturing epic, unscripted moments for adventurous couples in the Rocky Mountains. View my portfolio and book your date."
Once you've got these basics down, the next big step is figuring out what people are actually searching for. To do that, you need to learn how to build a keyword list that actually drives traffic.
Why Your Blog is Your Best SEO Tool
A blog is arguably the most powerful SEO tool a photographer has. Every single post creates a brand-new page on your site, giving you another shot at ranking for all sorts of specific, "long-tail" keywords. This strategy is especially potent for attracting local clients.
Put yourself in their shoes. They aren't just typing "photographer" into Google. They're asking specific questions: "best outdoor family photo locations in Austin" or "what to wear for a fall engagement session." Your blog is the perfect place to answer those questions.
When you share a recent shoot with a title like "A Sunny Downtown Chicago Engagement Session," you're immediately targeting clients in that market. You get to showcase your beautiful work, tell a compelling story, and naturally weave in the keywords that will connect you with the right audience. Some AI web builders are making this process incredibly simple. As one user said, "I'm so impressed! It's really user friendly and does a great job uploading imagery which I have found with other AI web builders really challenging." You can see more about how AI tools are helping creators on alpha.com.
Turning Your Website Into a Booking and Sales Machine
A jaw-dropping portfolio is a great start, but it's really only doing half the job. Let's move beyond just showing off your art and start actually generating business. This is the point where your website stops being a passive gallery and becomes a hard-working tool that streamlines your process and gets you paid.
First things first: you have to make it ridiculously easy for potential clients to get in touch. Your "Contact" page isn't just another link in the menu; it should be one of the simplest, most inviting pages on your entire site. Forget clunky, multi-step forms and aim for elegant simplicity.
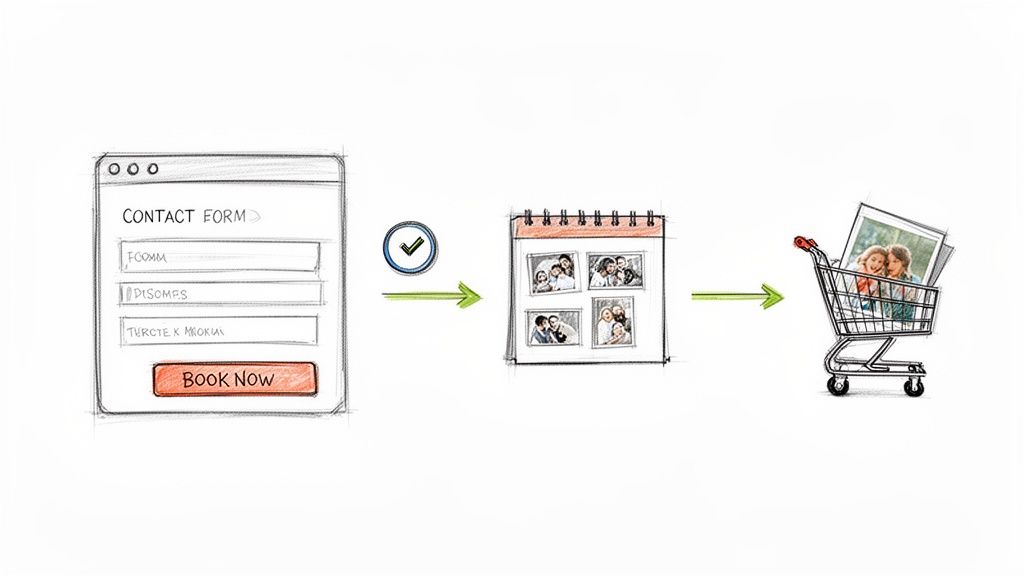
Building the Perfect Inquiry Funnel
Your main goal here is to remove every single bit of friction between a visitor’s interest and them sending you an inquiry. The best contact forms are short, sweet, and straight to the point.
These are the absolute must-haves for your form:
Name: So you know who you’re talking to.
Email: This is the most critical field for your follow-up.
Event/Session Date: Immediately helps you check your availability.
A Simple Message Box: Gives them a space to share their vision.
That's it. Seriously. Anything more, like asking for their budget or how they found you, can wait for your automated email response. The less work a potential client has to do upfront, the more likely they are to actually hit that "send" button.
Beyond the form, it’s always a good idea to offer other ways to connect. Some people just prefer to send a direct email, so list your professional email address clearly. If you have a business phone number, pop that on there, too.
Think of your contact page as the digital handshake. Make it welcoming, straightforward, and professional. It sets the tone for the entire client experience.
Driving Action with Strategic CTAs
A call-to-action (CTA) is just a fancy term for a prompt that tells someone what to do next. Just having a "Contact" link in your main navigation menu isn't going to cut it. You need to be actively guiding visitors from every single page toward taking that next step.
Your CTAs should feel urgent and speak directly to what your visitor wants. Instead of a weak and passive "Learn More," try something with a bit more punch.
"Book Your Free Consultation"
"Check My Availability"
"Inquire About Your Wedding Date"
"Download My Pricing Guide"
Place these buttons and links everywhere it makes sense: at the end of every photo gallery, right below your bio on the "About" page, and after you describe your services. Every time a visitor is wowed by your work, the next logical step should be right there waiting for them. It’s a simple change that can make a huge difference in how many inquiries you get.
Streamlining Your Workflow with Client Proofing
Once a client is booked and the shoot is done, the work is far from over. The post-shoot process can be a massive time-drain, but your website can automate a huge chunk of it. This is where client-proofing galleries come into play.
These are essentially private, password-protected galleries where your clients can view their photos, heart their favorites for you to edit, and even order prints on the spot. A good system completely replaces those endless back-and-forth emails and confusing spreadsheets.
Here’s why an integrated proofing system is a game-changer:
Professional Experience: It gives your clients a polished, branded space to interact with their photos.
Efficient Selection: Clients can easily build "favorite" lists that you can see on your end, clarifying the editing process.
Increased Sales: By hooking up a print store, clients can easily buy more products without you lifting a finger.
Setting Up Your Online Store for Passive Income
Why stop at booking sessions? Your website is the perfect platform to generate passive income by selling products to both your clients and your wider audience. In a market where 64.28% of photography services revenue came from online platforms in 2024, photographers with smart, e-commerce-ready websites are pulling ahead. You can dig deeper into these photography platform marketing statistics to see the trend.
Think bigger than just basic 8x10s. You can sell a whole range of products that add value for your clients and boost your bottom line.
Digital Downloads: Offer high-resolution files for personal use or even sell commercial licenses.
Prints and Wall Art: The best way to do this is to partner with a print-on-demand service that plugs right into your website builder. They handle all the printing, framing, and shipping; you just collect a profit.
Photo Packages: Create attractive bundles that include prints, an album, and digital files all in one.
By putting these business tools in place, your website transforms from a simple portfolio into a true booking and sales machine. It works for you 24/7, turning interest into income and freeing you up to do what you actually love—creating incredible images.
Getting Your Photography Website Live and Keeping It Sharp
Flipping the switch and launching your website is a fantastic feeling. But hold on—don't just blast that URL everywhere just yet. That moment before you go live is your last chance to make sure everything is perfect for your first visitors. A quick, thorough once-over now can save you from a lot of "oops" moments later.
Think of it as your final quality check before a client reveal. Go through every single page. Click every link. Fill out your own contact form to see if the message actually gets to you. And most critically, pull it up on your phone. Does it look just as good as it does on your desktop? You'd be surprised how often something looks great on a big screen but is a jumbled mess on mobile.
Knowing What's Working (and What's Not)
Once your site is live, the game changes. You've built the gallery; now it's time to see which pieces people are stopping to look at. This is where your website's analytics come in, and you don't need to be a data guru to understand them. Most website builders have a simple dashboard that tells the story of your visitors.
Keep an eye on a few simple numbers:
Who's Visiting? How many people are stopping by, and when are they most active?
What Do They Love? Which galleries or blog posts get the most clicks? This is your audience telling you exactly what kind of work they want to see more of.
How Did They Find You? Are people coming from Google, a link on Instagram, or a referral from another site?
This data is your secret weapon. If you notice a recent wedding gallery is getting tons of traffic from Pinterest, that’s your cue to pin more images from that shoot. If a blog post about "what to wear for family photos" is a huge hit, maybe a follow-up post is in order. It's all about listening to what the data is telling you.
A Simple Plan to Keep Your Site Fresh
Your website isn't a brochure you print once and forget about. It's a living, breathing part of your business that needs a little bit of care to stay healthy, secure, and effective. A little monthly TLC will keep your online studio looking its best.
Your website isn’t a "set it and forget it" project. Consistent updates signal to both clients and search engines that you are an active, professional, and relevant photographer.
Just block out an hour or two each month to run through a quick checklist:
Freshen Up Your Portfolio: Your work is always evolving. Make sure your website reflects your best and most recent shots.
Run a Backup: Most quality platforms handle this automatically, but it never hurts to confirm you have a recent backup saved. Peace of mind is priceless.
Add Something New: A quick blog post from a recent session or a small update to your "About Me" page keeps things from getting stale.
This small, consistent effort pays off big time, ensuring your site continues to be a powerful tool for attracting and booking the clients you want. The right platform can make this feel less like a chore and more like a natural part of your workflow. As one photographer put it, "Alpha built my website quickly and perfectly, nothing else I tried compared AT ALL." You can check out their top-notch website creation tools here.
Answering Your Lingering Questions
Even the best-laid plans come with questions. As you start piecing together your own photography website, a few common queries are bound to pop up. Let's tackle some of the most frequent ones I hear from photographers.
How Many Photos Should I Put on My Website?
This is a classic, but the answer is always the same: quality trumps quantity, every single time. A focused, killer portfolio of your 20-30 absolute best images will make a much stronger impression than a sprawling gallery of 100 mediocre shots.
Think of your website as a fine art gallery, not a storage locker. Your homepage should immediately hit visitors with a handful of your most breathtaking work. Then, use your gallery pages to organize specific projects or specialties. The idea is to wow them fast, not make them scroll forever.
Your portfolio is your highlight reel, not your entire archive. Every single photo should scream, "This is the work you should hire me for." A lean, confident portfolio shows you know what you're doing.
Do I Really Need a Blog on My Photography Site?
Need one? Maybe not. But should you have one? Absolutely. A blog is arguably the single most effective tool you have for reeling in new clients from search engines like Google.
Every blog post is a new page for Google to index and a new chance for someone to find you. It lets you target specific, high-intent phrases people are actually searching for, like "candid wedding photographer in Austin." It’s also the perfect place to show off your latest sessions and tell the stories behind the photos, which builds trust and a real connection with potential clients long before they ever reach out.
What’s the Single Most Important Page on My Website?
Your Portfolio or Gallery pages are the heart and soul of your site. They're where you prove your skill. But your Contact page is an extremely close second.
Think about it—if a potential client falls in love with your images but can't quickly and easily figure out how to hire you, your entire website has failed at its primary job. Don't make them hunt for that "Contact Me" button.
Ready to build a stunning website that turns visitors into paying clients, without ever touching a line of code? Alpha uses AI to help you launch a professional online studio in minutes. Get started today and turn your portfolio into a booking machine at https://www.alpha.page.
Build beautiful websites like these in minutes
Use Alpha to create, publish, and manage a fully functional website with ease.