How to Create Website Mockups People Actually Love
Learn how to create website mockups that bridge the gap between idea and reality. Our guide covers tools, principles, and developer handoff.

Build beautiful websites like these in minutes
Use Alpha to create, publish, and manage a fully functional website with ease.


So, you're ready to add Google Analytics to your website. The process is pretty straightforward: you'll create something called a GA4 property, grab your unique Measurement ID, and then pop a small tracking snippet onto your site. You've got a few ways to do this—you can add the code directly, use a tool like Google Tag Manager, or see if your website platform has a built-in integration.
Why Connecting Google Analytics Is a Game-Changer

Before we jump into the step-by-step, let's talk about why this is so important. Installing Google Analytics isn't just about checking a box on your to-do list. It's the moment you stop guessing and start making smart, data-driven decisions that actually grow your business.
Think of it this way: running a website without analytics is like flying a plane blind. Sure, you might feel like you're gaining altitude, but you have no idea what’s actually working. Was it that new blog post that brought people in? Your latest social media push? Or did you just get a lucky mention somewhere? Google Analytics 4 (GA4) is the control panel that gives you that crucial visibility.
To give you a clearer picture, here’s a quick rundown of the major wins you get by setting up GA4.
Benefit | What It Means for Your Website |
|---|---|
Understand Your Audience | Go beyond simple demographics to see what your visitors are truly interested in and how they found you. |
Optimize User Experience | Identify which pages are performing well and, more importantly, where users are dropping off, so you can fix what's broken. |
Track Marketing ROI | See exactly which channels (social, search, email) are driving not just traffic, but actual conversions and revenue. |
Improve Content Strategy | Pinpoint your most popular and engaging content, allowing you to create more of what your audience loves. |
Ultimately, GA4 gives you the concrete data you need to turn your website from a digital brochure into a powerful business tool.
From Vague Metrics to Actionable Insights
The real power of GA4 kicks in when you start using it to answer important business questions. You stop looking at vanity metrics like total visitors and start digging into the user behaviors that actually impact your bottom line.
Here’s what that looks like in the real world:
Find Your Best Content: You can quickly see which blog posts or landing pages keep people hooked the longest and, more importantly, which ones lead to a sale or a sign-up.
Spend Your Marketing Budget Smarter: Analytics shows you exactly which channels—organic search, paid ads, social media—are sending you valuable traffic that converts, not just clicks.
Enhance the User Journey: Discover the exact pages where people bail. A high exit rate can signal a design flaw, confusing navigation, or a broken form that you need to fix.
The modern web is all about the user journey. GA4 was built from the ground up with an event-based model to reflect this reality. It tracks meaningful interactions like video plays, form submissions, and file downloads—not just page views—giving you a complete picture of how people engage with your brand across multiple visits and devices.
The Power of Data-Driven Decisions
There's a reason learning how to add Google Analytics is such a fundamental skill. The platform is used on an incredible 55.49% of all websites, a clear signal of its value to businesses of every size.
To really dial in your marketing, you'll want to get comfortable using Google Analytics UTM parameters to precisely track campaign performance. And if you want a solid primer on the big-picture concepts, our guide on what is website analytics is a great place to start.
Creating Your GA4 Property and Data Stream
Alright, let's get our hands dirty. The first stop on our analytics journey is inside the Google Analytics platform itself. Before a single line of code touches your website, we need to build the "house" where all your data will live. This means setting up a GA4 Property and then creating a Data Stream.
Think of the Property as the main file cabinet for your website's analytics. The Data Stream is the specific folder inside that cabinet for your website traffic. Getting this initial structure right is the foundation for everything that comes next.
Setting Up Your First GA4 Property
If you're brand new to Google Analytics, you'll first be guided to create an Account. This is just the highest-level container, perfect if you end up managing several different websites down the road.
Once you’ve named your account, it's time to create the Property. You’ll be asked for a few key details:
Property Name: Be descriptive. Something like "My E-commerce Store" or your actual company name works perfectly.
Reporting Time Zone: This is a big one. Choose the time zone where your business day actually happens. It ensures your daily reports line up with your real-world schedule.
Currency: Pick the currency you do business in. This is non-negotiable if you plan on tracking sales or e-commerce data.
These settings might seem small, but they have a real impact on how your data shows up in reports. Take a second to get them right from the get-go.
Generating Your Website Data Stream
With the Property in place, GA4 will prompt you to create a Data Stream. This is basically telling Google where the data is coming from. Since we're hooking this up to a website, you’ll choose the "Web" option.
Next, you'll plug in your website's URL and give the stream a name. You'll also see an option for Enhanced Measurement. I highly recommend leaving this turned on. It's a fantastic feature that automatically tracks things like page scrolls, clicks on outbound links, and file downloads right out of the box—no extra work required.
Key Takeaway: The whole point of this process is to get your Measurement ID. This is the unique code that acts like a key, connecting your website directly to your GA4 property. It will always start with "G-". You'll need this ID no matter which installation method you choose.
After creating your web data stream, you'll see your Measurement ID displayed prominently, just like in the screenshot below.
This ID is the golden ticket. Copy it and keep it handy for the next steps. It's the piece of the puzzle that links your site to the powerful world of GA4, a platform that's now used by over 14.2 million websites since Universal Analytics was sunset in 2023. If you're curious, you can dig into more GA4 adoption trends and statistics.
Which GA4 Setup Method Is Right For You?
You’ve got your Measurement ID—now comes the fun part: plugging it into your website. This isn't a one-size-fits-all situation. The best way to get Google Analytics running depends on your website's platform, how comfortable you are poking around in code, and what you plan to do with your data down the line.
Your choice here really boils down to three paths. You can use a simple plugin or a built-in integration, add the code snippet directly to your site’s HTML, or go the professional route with Google Tag Manager (GTM).
This diagram gives you a quick visual to help point you in the right direction.
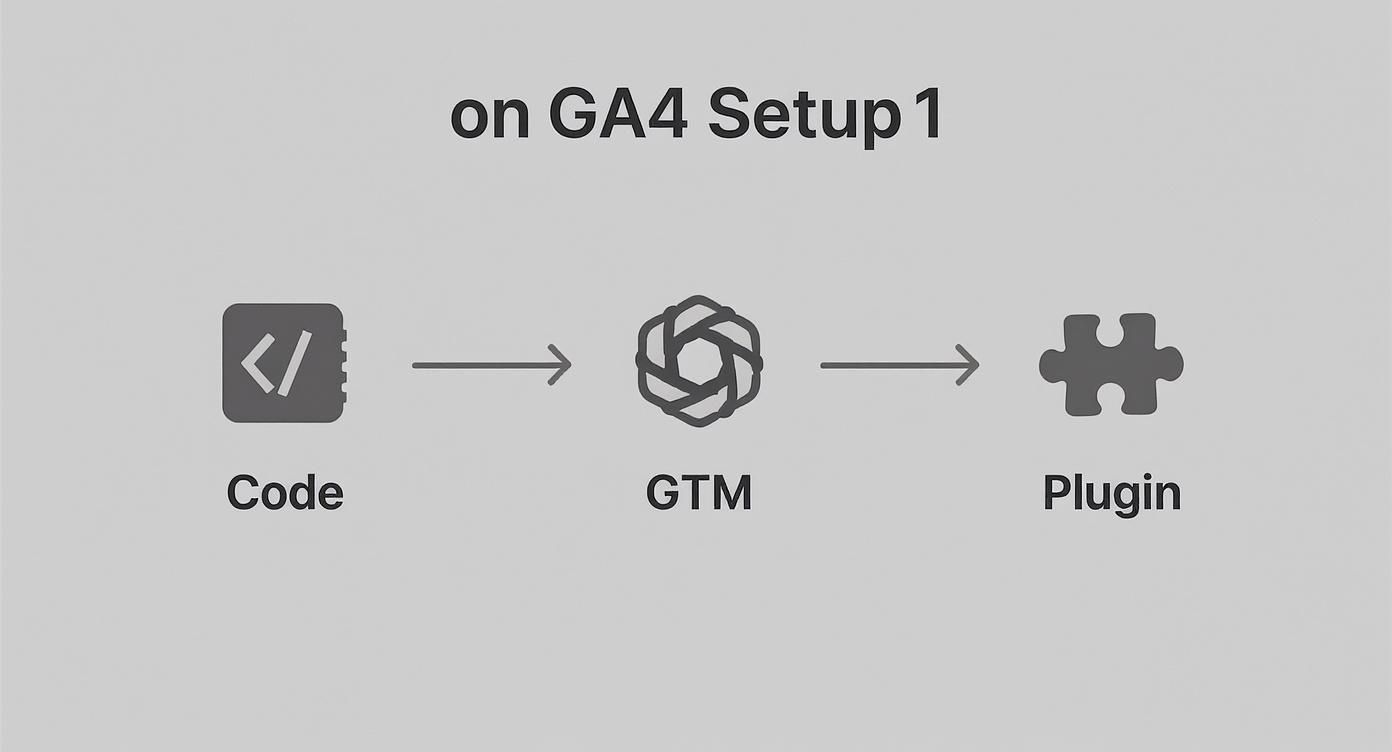
Think of it as a decision tree: based on your technical confidence and site platform, it guides you to the most sensible installation method, whether that's a direct code edit, a simple plugin, or the more robust GTM.
The Quick and Easy Way: Using a Plugin or Built-in Integration
For most people, this is the fastest and most foolproof way to get GA4 up and running. If your website is built on a popular platform like WordPress, Shopify, or Squarespace, chances are there’s an official integration or a trusted plugin that handles everything for you.
You won't have to touch a single line of code. These tools usually just give you a simple field in your website's admin panel where you paste your "G-" Measurement ID, hit save, and you're done.
For example, our own Alpha website builder has this feature built right in. You just copy, paste, and your analytics are live. This is a common feature among the best website builders for beginners. The only real downside is that you have less control over advanced tracking and have to rely on the platform for updates.
The Direct Approach: Adding the Code Snippet Manually
If you have a custom-built website or you just prefer to keep things lean without extra plugins, you can add the Google Analytics tracking code directly into your site’s HTML. This means copying the JavaScript snippet Google provides and placing it in the <head> section of every page on your site.
It's a very clean installation. The catch? You have to be comfortable editing your website's core files. One small slip-up—pasting the code in the wrong place or accidentally deleting a character—can cause display issues or even break parts of your site.
My Advice From Experience: If you go this route on a platform like WordPress, always use a child theme. Otherwise, the next time you update your main theme, you'll wipe out the tracking code you just added. It’s a classic mistake I’ve seen countless times.
The Power User's Choice: Using Google Tag Manager (GTM)
This is the method I recommend for anyone serious about digital marketing. Google Tag Manager is a free tool that acts as a container for all your tracking scripts. You install the GTM container on your site once, and then you can add, manage, and deploy all your other tags (GA4, Facebook Pixel, LinkedIn Insight Tag, etc.) from the GTM dashboard—no more code editing required.
Yes, there's a bit of a learning curve. You'll need to get familiar with concepts like tags, triggers, and variables. But the payoff is huge. The long-term flexibility and control you gain are incredible. Want to track every click on a specific "Download PDF" button? In GTM, that's a few minutes of work, not a request to your developer.
To help you weigh your options, here’s a quick side-by-side comparison.
Comparing GA4 Installation Methods
Deciding how to install GA4 can feel like a big step, but it's really about matching the method to your current needs and future ambitions. This table breaks down the three main options to help you see which one is the right fit for you.
Method | Best For | Technical Skill Required | Pros & Cons |
|---|---|---|---|
Plugin / Integration | Beginners and anyone on a major CMS (WordPress, Shopify, etc.). | Low. If you can copy and paste, you can do this. | Pros: Super fast and easy. No code required. Cons: Less flexible, reliant on third-party developers. |
Direct Code Snippet | Developers, custom-built websites, or minimalists who hate plugins. | Medium. You need to be comfortable editing HTML files directly. | Pros: Clean, direct installation with no extra layers. Cons: Easy to make mistakes; code can be overwritten during theme updates. |
Google Tag Manager | Marketers, agencies, and businesses planning for growth. | Medium to High. It's not coding, but it has its own learning curve. | Pros: Unmatched flexibility, centralizes all tags, powerful event tracking. Cons: Takes more time to set up and learn initially. |
Ultimately, there's no wrong answer here, just a better one for your specific situation. If you're just getting started on a standard platform, a plugin is a perfectly good choice. But if you have any inkling that you'll want to get more sophisticated with your data and marketing down the road, taking the time to learn Google Tag Manager now will save you a world of headaches later.
How to Verify Your Google Analytics Setup

Alright, you've gone through the steps and installed the tracking code. But the job isn't done until you know for sure that it's actually working. This final check is all about confirmation, and thankfully, Google Analytics gives you a simple, satisfying way to see data flowing in almost immediately.
Don't be tempted to skip this part. A successful installation is the bedrock of every insight you'll gather later. If you don't verify it now, you could end up with flawed data—or no data at all—making your reports completely useless down the road.
Using the Realtime Report for Instant Confirmation
The quickest and easiest way to check your work is by jumping into the GA4 Realtime report. It's built to show you activity happening on your site right now, usually within a minute or two of it occurring.
Here’s the simple process:
First, open your Google Analytics 4 property.
Next, in a totally separate browser window or tab, go to your own website. Click on a few different pages to simulate some real user activity.
Finally, head back to your GA4 dashboard and navigate to Reports > Realtime in the menu on the left.
If everything is connected properly, you'll see at least one user pop up on the map and in the "Users in Last 30 Minutes" card. That's you! Seeing that first data point appear is a great little moment that confirms your hard work paid off.
Advanced Verification with Google Tag Assistant
What happens if you don't see anything in the Realtime report? Don't panic. Sometimes there are small delays due to browser caching or other minor hiccups. For a more direct and powerful way to diagnose what's going on, you can turn to Google Tag Assistant.
Tag Assistant is a fantastic tool that shows you exactly which tags are firing on your website pages. If you installed GA4 using Google Tag Manager, for example, just entering Preview mode automatically connects you to Tag Assistant. If you added the code directly to your site, you can use the Tag Assistant Companion browser extension. It will show you point-blank if your GA4 tag was found and whether it successfully sent data.
Expert Tip: A common culprit for failed tests is your own cookie consent banner. These banners are designed to block GA4 scripts from running until a visitor opts in. If you're testing and nothing shows up, make sure you've actually accepted your own site's cookie policy first.
A Quick Tour of Your First Meaningful Reports
Once you're verified and data has had some time to accumulate (give it about 24-48 hours for the standard reports to populate), you can start exploring. GA4 is packed with reports, but here are two essential places to begin your journey:
Traffic Acquisition Report: You'll find this under Reports > Acquisition > Traffic acquisition. This report is gold because it tells you how people are finding your website. You'll see valuable data broken down into channels like "Organic Search," "Direct," and "Referral."
Engagement Report: Tucked away under Reports > Engagement, this section shows you what people are doing once they arrive. Pay close attention to key metrics like "Views," "Engaged sessions," and "Average engagement time" to understand user behavior.
Getting comfortable with these initial reports is the first real step in learning how to analyze website traffic and turning all this data into actionable business intelligence.
As your data collection grows, remember that data privacy is more important than ever. GA4 has faced its share of regulatory hurdles under GDPR in Europe, with some countries temporarily restricting its use over data transfer concerns. This just goes to show how critical it is to stay informed about privacy laws, as highlighted in this overview of Google Analytics statistics.
Troubleshooting Common GA4 Installation Issues
https://www.youtube.com/embed/J8hl-Ov1BDI
Even with the most careful setup, you can still hit a snag. Staring at an empty Realtime report when you know you're on the site is a special kind of frustration. But don't worry—most installation problems are common and surprisingly easy to fix.
Think of this as your first line of defense before you start pulling your hair out. The goal is to methodically check for the usual suspects. More often than not, the problem isn't some deep technical bug but a simple oversight, like a typo in your Measurement ID or a stubborn browser cache.
Let’s walk through the most frequent issues I see and how to get them sorted out.
Why Is My Realtime Report Empty?
This is, without a doubt, the most common question I get after someone sets up GA4. You’ve installed the code, you're clicking around your own website, but that Realtime report is stuck at zero. Before you panic, let's run through a quick diagnostic checklist.
Check for Typos: Are you sure the Measurement ID you pasted into your website or plugin is a perfect match for the one in your GA4 Data Stream? It's so easy for a single character to be off, and that's all it takes to break the connection. Copy and paste it again just to be safe.
Clear Your Cache: Your browser loves to save time by showing you an old version of your site. That old version probably doesn't have your new GA4 script on it. Do a hard refresh or clear your browser cache completely and try again.
Cookie Consent Banners: Did you actually accept your own cookie policy? Modern consent tools are designed to block scripts like GA4 from firing until a visitor explicitly opts in. If you clicked "decline" or just ignored the banner on your own site, GA4 is doing its job by not tracking you.
Ad Blockers: Many ad blockers and privacy-focused browser extensions are pretty aggressive and will stop the Google Analytics script from ever loading. Try turning them off for your site and see if you pop up in the Realtime report.
I once spent an hour debugging a client’s setup only to realize their WordPress caching plugin was so aggressive it took 30 minutes to serve the updated page with the new GA4 tag. Always clear your server-side cache if you use one!
Am I Tracking Traffic Twice?
On the flip side, maybe your numbers look a little too good. Inflated user counts are a classic sign of double-tracking, which happens when you have multiple GA4 tags firing on the same page.
This is a common mix-up. For instance, you might have added the code manually to your theme's header and also used a plugin to do it. Or perhaps you have an old Universal Analytics tag still firing alongside your new GA4 tag, muddying the waters.
The best way to diagnose this is with the official Google Tag Assistant browser extension. Head to your site, enable the extension, and it will show you exactly which Google tags were found and what data they sent. If you see more than one GA4 tag sending a pageview for a single page load, you've found the culprit.
Thankfully, the fix is simple: figure out where the duplicate code is coming from and remove one of them. Your data will be much cleaner and your user counts will be far more accurate.
Got Questions About Setting Up Google Analytics? We’ve Got Answers.
Even the most straightforward process can throw you a curveball. It’s totally normal to have a few lingering questions after setting up Google Analytics for the first time.
Let's walk through some of the most common ones I hear from people, so you can get your tracking sorted out and move forward with confidence.
How Long Does It Take for Data to Show Up in GA4?
Good news: you should see signs of life almost immediately.
The quickest way to check if everything is working is to pop open the Realtime report in your GA4 property. Visit your own website in a separate tab, and within a minute or two, you should see your own visit pop up. It's the best "it's alive!" moment.
But don't panic if your main dashboards look empty at first. The standard, more detailed reports (like your traffic sources and user engagement) need time to process everything. Expect a delay of 24 to 48 hours before that data is fully populated. This is standard procedure for Google Analytics.
Can I Really Add Google Analytics to WordPress Without a Plugin?
You absolutely can, and sometimes it's the right move if you want to keep your site lean. While plugins are convenient, you can add the GA4 tracking code directly into your WordPress theme files.
Here’s the manual approach:
In your WordPress dashboard, go to Appearance > Theme File Editor.
Find the file named
header.phpin the list on the right side of your screen.Carefully paste your entire GA4 measurement snippet (the full
gtag.jscode) right before the closing</head>tag.
A quick but important word of warning: If you do this, make sure you're using a child theme. If you add the code directly to your main theme's files, it will get wiped out the next time you update the theme. I've seen it happen many times, and it’s a frustrating way to lose your tracking data.
What’s the Difference Between a Property and a Data Stream?
This one trips a lot of people up, but the analogy is simple. Think of your Google Analytics account as a filing cabinet.
An GA4 Property is the entire filing cabinet for your business. It’s the container that holds all the analytics data for a specific brand or project.
A Data Stream is like a single folder inside that cabinet. Each folder collects data from one specific source—your website, your iOS app, or your Android app.
You might have a single GA4 property for your company, but inside it, you’ll have a separate data stream for your website and another for your mobile app. This setup lets you see a unified view of how users interact with your brand across different platforms, all in one place.
Does the Google Analytics Code Need to Be on Every Single Page?
Yes, it does. For GA4 to give you a complete and accurate picture of user behavior, the tracking snippet has to be present on every single page you want to track.
Fortunately, this is almost never a manual task. Modern websites are built with templates. You'll have a universal header or footer file that appears on every page of your site. Just place the GA4 code in that one central file, and it will automatically be loaded everywhere. Set it once, and you're done.
Ready to build a website that's as smart as it is beautiful? With Alpha, you can launch a stunning, SEO-optimized site in hours, not weeks. Our AI-powered platform makes it easy to create professional designs and integrate essential tools like Google Analytics without touching a line of code. Start building for free today.
Build beautiful websites like these in minutes
Use Alpha to create, publish, and manage a fully functional website with ease.